Part 9: Mastering Linocut – Troubleshooting and Artwork Preservation
Anyone working with linocut will inevitably encounter unexpected problems. Issues like uneven ink coverage or smudged fine lines can be challenging for beginners and experienced printmakers alike. This chapter will explore the causes and solutions for common problems and discuss how to professionally finish and preserve your completed artworks.
9.1. Troubleshooting Guide
- Problem: The print is splotchy or has a ‘salt and pepper’ effect.
- Causes: Insufficient ink, rolling the ink too dry on the brayer, uneven or weak rubbing pressure, or using paper that is too thick or textured for hand printing.
- Solutions: Apply ink in several thin layers to ensure sufficient coverage. Listen for the ‘velvety hiss’ of the ink. When using a baren, apply body weight and rub firmly and thoroughly in circular motions. Use the ‘peek test’ to identify and re-burnish any areas that are not printing well. For hand printing, switch to a thinner, smoother paper.
- Problem: Finely carved lines are filled in with ink and appear smudged.
- Causes: Applying too much ink to the block, or the ink itself is too thin.
- Solutions: Roll out the ink as thinly as possible on the inking slab and apply it to the block in several thin layers. If the ink is too runny, let it sit on the slab for a few minutes to thicken before use.
- Problem: The paper tears during hand burnishing.
- Causes: The paper is too thin and weak, or too much pressure is applied to one spot with a sharp edge of a spoon.
- Solutions: Place a protective sheet, like baking paper, over the print paper before rubbing. This distributes the pressure and reduces friction, protecting the paper. Be conscious of using the wide, flat side of the baren or spoon.
- Problem: The carving tool slipped and cut an unintended area.
- Causes: Carelessness or inexperienced tool handling.
- Solutions: If it’s a small slip, you might be able to incorporate it naturally into the design. For a larger mistake, you can ‘patch’ the area. Apply wood glue to the mistake and attach a scrap piece of linoleum. Once the glue is dry, sand down the patch to be level with the original block surface, and then re-carve it.
Ultimately, mastering linocut is not just about reducing mistakes but also about learning to embrace unintended results—’happy accidents’—as artistic elements. It’s important to understand that minor block imperfections or slight ink smudges can add vitality and unique character to your work.
9.2. Finishing Your Work Like a Pro: Editioning and Signing
Because printmaking allows for multiple copies, there is a standard notation for finished works. This is an important procedure that guarantees the value and authenticity of the artwork.
- Edition: A limited set of prints made from the same block.
- Editioning Notation: Typically written in pencil below the image. On the left, the edition number is written as a fraction (e.g., ‘3/20’ means the third print out of a total of 20). The title of the work is in the center, and the artist’s signature is on the right.
- Special Prints: Special abbreviations are sometimes used instead of an edition number.
- A.P. (Artist’s Proof): For the artist’s personal collection, usually about 10% of the total edition size.
- T.P. (Trial Proof): A test print made during the process to check colors or the state of the block.
- C.P. (Cancellation Print): After the entire edition is printed, the block is defaced (e.g., with an ‘X’) and a final print is made to prove that no more can be printed.
Following these professional notations is a process of elevating your work from a simple craft item to a formal piece of art recognized in the art market.
9.3. Storing and Displaying Your Artwork
Proper storage is crucial to preserve your carefully made linocut prints in the best condition for a long time.
- Storage: It’s best to store prints flat between sheets of acid-free paper. Keep them in a cool, dry place away from direct sunlight and humidity to prevent yellowing of the paper and deterioration of the ink.
- Display and Framing: When framing a work for display, use UV-protective glass and a mat to create space between the artwork and the glass. The mat should also be made of acid-free material to prevent damage to the artwork.
These storage and care methods not only extend the physical life of your artwork but also represent the final step in showing respect for your effort and creation.
[ 여기에 광고 코드가 삽입됩니다 ]
A Banana with a Sticker |
A Bartlett Pear |

A Black Radish |
A Bleeding Heart Flower |

A Blooming Lotus Flower |
A Blue Bachelor’s Button |

A Blue Cornflower |

A Blue Cornflower Petal |
A Blue Delphinium |

A Blue Delphinium Floret |
A Blue Hydrangea |

A Blue Morning Glory |
A Blue Salvia Blossom |
A Bosc Pear |

A Branch of Bay Leaves |

A Branch of Lilac |
A Branch of Olive Leaves |

A Bright Sunflower |

A Brown Mushroom |

A Bunch of Bananas |
A Bunch of Cilantro |

A Bunch of Concord Grapes |

A Bunch of Grapes |
A Bunch of Green Bananas |

A Bunch of Mint Leaves |
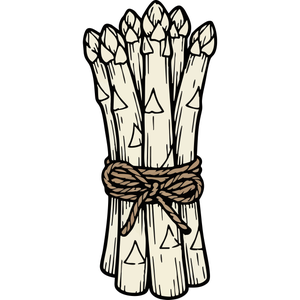
A Bunch of White Asparagus |
A Bursting Tomatillo |
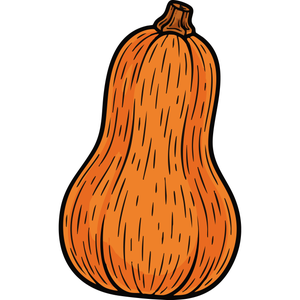
A Butternut Squash |

A Cabbage Leaf |

A California Poppy |
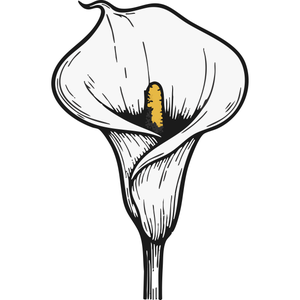
A Calla Lily |

A Calla Lily Bud |

A Camellia Bud |

A Camellia Leaf |
A Canary Melon |
A Cantaloupe Melon |

A Chanterelle Mushroom |

A Cluster of Black Currants |
A Cluster of Capers |

A Cluster of Cranberries |

A Cluster of Elderberries |
A Cluster of Enoki Mushrooms |
A Cluster of Goji Berries |
A Cluster of Longan |
A Cluster of Oyster Mushrooms |

A Cluster of Raspberries |
A Cluster of Raw Cashews |
A Cluster of Roma Tomatoes |

A Cremini Mushroom |

A Crushed Raspberry |

A Curled Cinnamon Stick |
A Daffodil Trumpet |
A Dandelion Blowing Seeds |

A Dark Purple Calla Lily |

A Dewdrop on a Leaf |
A Diagonal Carrot Slice |

A Dried Bay Leaf |
A Dried Cannellini Bean |

A Dried Hibiscus Flower |

A Dried Lima Bean |
A Dried Pinto Bean |

A Dried Red Chili |
A Dried Shiitake Mushroom |

A Dried Sunflower Head |
A Dripping Peach Slice |

A Fava Bean Pod |
A Fennel Cross Section |

A Fern Frond |

A Fiddlehead Fern Coil |
A Fig Cross Section |
A Flowering Kale |

A Forget Me Not Flower |

A Four Leaf Clover |

A Fresh Bay Leaf |

A Fresh Hop Cone |

A Fresh Spinach Leaf |

A Fresh Turmeric Root |

A Gardenia Bud |

A Garlic Bulb Top View |

A Ginger Root |
[ 여기에 광고 코드가 삽입됩니다 ]